December 30, 2010

Curtains! (almost)

People, I have a confession to make. We have lived in this house for 8 YEARS and I've never had curtains in my living room. Never. Ever.
I've never really been much for window dressings. I don't get fancy, I don't spend a lot of money. And for some reason I'm really intimidated by them. Silly huh?
So my goal for the last 8 years few months has been to finally make a decision on what I'm going to do with my big front window. It's a bay window, but not a cool seat type of bay window as it's 3 ft from the floor. The total dimensions, including the trim around it is 6 ft wide by 4 ft 2 in tall.
I know what you're thinking. Just make two long panels on each side of the window to kind of frame it. Yep, I've thought of that, and that's what I'm trying to go for. I even bought a curtain rod 3 YEARS AGO which you can see in the picture. It's been on the wall, taunting inspiring me for that long. But, (and it's a big but) there are heat vents against the wall directly below where those nice panel curtains would hang. Because they have to go to the floor. They can't be the same length as the window. They just can't. I'd feel like I was living in a Super 8 hotel. Not even a Holiday Inn Express, a Super 8. And even I don't sink that low. (Plus there's a little thing called money missing from my life these days, so there's another obstacle. Just throwing that out there.)   *sigh

 
Well let me tell you, I was at Target doing some Christmas shopping (with that money I don't have) and came across these shower curtains ON SALE.  And there were a crapload of them. In my color none the less!  I heard the angels sing, and then they started hacking and coughing like they were lifetime smokers because I realized that these shower curtains won't be long enough to reach the floor. But then they cleared the phlem and started singing again, because I realized I can just add a panel to get some more length! YAY!


But, (and it's a big but again) I can't for the life of me figure out where exactly on the curtain I should add the panel, AND (the most important part) which color I should use for the "extender piece".  *sigh    My living room colors are tan, white, red, and dark chocolate brown. Walls are tan, trim (except for said window) is white, hardwood floors are the ugliest scratched up Golden Oak color, along with the bay window trim, but accent shelves and such are dark brown.
HELP ME PEOPLE. What should I do? Do I use dark brown for the "extender piece"? White? God knows I don't want to try and match this red, you know how that can go.  AND, do I insert the "extender piece" at the bottom? Somewhere toward the top, but a little below, so there's red on top? Gawd, I just can't make this decision. This is worse than trying to decide what to use for the binding on a quilt. *sigh

(and yes, those are also white shower curtains in the picture, and they're for my next meltdown project.)

December 16, 2010

White Elephant Gift Wrapping

I have a White Elephant gift exchange at work tomorrow. I almost forgot about it.


So.......in a pinch, I went through our old CDs and found this Holiday CD from Old Navy. I think it was like $3 when I bought it, and I don't love it, so maybe some lucky sucker in my office will appreciate it more. Or not.

Since we don't have our Box O' Christmas Wrap down yet, I went with the old stand by - aluminum foil.

Now, being the crafty chic I am, the plain ol' foil wouldn't do, so of course I had to jazz it up with some painters tape as the ribbon. And a bow. Perfect.

I seriously LOVE White Elephant parties. It's so fun to see what kind of crap will get unwrapped next. The first White Elephant gift exchange I ever attended, I unwrapped a pitcher that looked like a monkey humping holding a pumpkin. It was awful. And awesome.

Merry Chistmas everybody!

December 14, 2010

Best Craftshow In Denver

Fancy Tiger's Holiday Handmade 2010.


I had a great time, sold a bunch, and have had a post craft show hangover for a week.   


This was the first time I've ever done an 8 x 8 booth, and although it worked well, a few tweeks need to be done before next time. Like finding somewhere for me to be instead of hiding behind the champaign crate. I swear I scared a few people jumping out to say hi. Also, having some kind of check out station would be nice. Trying to write receipts, run credit cards on a knucklebuster, and count money in 10 square inches just doesn't work well.


It was interesting to see what did and didn't sell this year. My pendants that almost sold out last year, didn't do so well this year. I sold more moleskines than last year, but hardly any pincushions went out the door this year. Maybe it was my pricing changes, maybe it was the fabrics used this year vs. last year. I've heard it said by craftshow veterans, every show is different. You just never know.


I do LOVE doing these shows. I love chatting with people, processing the transactions, seeing people's reactions (good and bad) to my products. It's fun. It makes me proud. And it wipes. me. out.

November 24, 2010

The Christmas Crunch

My little ol' craft business Quay & Co. will be participating in Holiday Handmade 2010!!


This is Denver's biggest alternative craft market, and let me tell you, there are some AWESOME crafters involved.

This is not your grandma's craft show.

Here's a sneak peek at some of the items I'm working on.

October 20, 2010

Singer Featherweight 221 Egyptian Scroll Faceplate - SOLD


Holycrap people. LOOK WHAT I FOUND AT GOODWILL!! Isn't she beautiful??

Best thrifted item. EVER.

I really need to give The Gardener Guy credit for finding this ol' gal. I was checking out another old sewing machine when he opened this non-descript case next to me.
AND I HEARD THE ANGELS SING.


She came with so many attachments, I don't even know what they do.  Except for the buttonholer. And ruffler. Those are pretty obvious.

I did find a small problem. The bobbin case needs to be replaced. So I got on eBay. A new bobbin case will cost more than what I bought the whole machine for. Grrrrr. I was able to borrow one from my friend, so I know she sews, and does a bangin' job, but really, she's an old gal and could probably use a tune up.

But honestly, I didn't buy her to use her. I knew when I bought her that she would be an investment.

And so I offer her to you. Email me if you're interested, we can discuss details then.


For now, just try looking at this beauty without drooling. I dare you.

August 26, 2010

Dog Doo Compost Bin


This summer we installed a new feature, though well hidden, in our backyard. Gardener Guy had seen on an HGTV show how to compost dog waste. Yep, that's right, good old fashion dog poop.

We have a 3 yr old Golden Retriever named Dixie, and trust me, she puts out plenty of waste, and sizable for that matter. Okay sorry, TMI.  Since Gardener Guy got tired of hearing me complain about the smelly bags waiting for trash day, he decided to try this method of disposing of the doo.

This is a great family activity to do on the weekend, it only took a couple of hours. And seriously, aren't all kids fascinated with doo?

**Don't worry, there are no pictures of the actual doo used to make this tutorial**

Here's what you'll need:
Plastic bin with a lid. We used an empty cat litter box with a flip top lid, but you could also use a 5 gallon bucket.
Rocks. We used some lava rock that was on the side of the garage.
Shovel.
Drill with 1/2 inch drill bit.
Utility knife or saw.
Septic tank bacteria in powder form.
Water.


 Here's how you do it:

Prepare the site.
  1. Dig a hole. We dug ours a little deeper than the depth of the container. We chose to put ours in the dog run as close to the property line as possible. *Read: As far away from the house as possible. 

Prepare the container.
  1. Cut the bottom off of plastic container.
  2. Drill holes around sides of container. This is for drainage.

Now to put it all together.
  1. Insert plastic bin into the hole. Make sure the lid is above ground, but that everything else is below ground.
  2. Put a couple of inches of rock in the bottom. Again, for drainage. 
  3. Fill in the hole so there is no space between the container and the ground. 
  4. Insert dog doo into container. 
  5. Sprinkle with bacteria powder.
  6. Water well. And I mean well. 

Essentially, what you've just made is a mini septic tank. It won't hold water, but the bacteria will eat away the doo.  You will need to rewater every day or so to make sure the bacteria can do it's job.

In hindsight, we probably dug our hole too deep and added too many rocks.  We're having an issue with getting enough water to stay in the container to do what it should. Other than that, I love it.

The best thing is that it DOES NOT SMELL. It's underground, and covered so odors never escape.

Let me know if you decide to do this too, would love to hear how you like it.

July 14, 2010

Indoor Box Turtle Habitat

We just built the COOLEST indoor habitat for our box turtle General Lee.  And when I say "we", I mean Gardener Guy.


Our friend gave General to us about 4 years ago, and at that time he was little. He was about the size of the top of a pop can. Yep, really little.  Since then, he's about doubled his size. So now, he's roughly 4 inches if you measure his shell from head to tail.

General's been living in a glass fish tank that had a 12 X 24 footprint, and there wasn't much room for him to play. Do turtles play?  We like to think they do, so we've been wanting to make him some kind of new home for a few years.  I mean, if you think about it, they do need a few critical items in their habitat. This website had some great suggestions, although we didn't follow every rule they had.  There had to be room for a water dish big enough for him to soak in, a feeding rock, and of course a cave of sorts, since they like to burrow and hide whenever possible.

As you can see, we've been able to provide all those necessities, and then some.  We're thinking of installing a putting green. Or a race track.


Here's how we did it.  Gardener Guy brought home some solid based pallets from work to use as the foundation, as well as for the walls.
  • He cut one pallet down to a 2ft x 3ft base and removed the slats of wood from another pallet to use for the walls. 
  • He caulked the cracks between the boards in the base.
  • We bought a 12  inch plastic pot tray and cut a whole in the base big enough so that the tray slips right in, but doesn't fall through.
  • Then we covered the base in indoor/outdoor carpet for the floor.  
  • He took the wood he had removed from the pallet, cut it into 11 inches long pieces and screwed it to the sides of the base to form the walls.
  • To stabilize the slats forming the walls, he took a few 2 x 1s and screwed them to the inside of the walls. These will also serve as a ledge to rest the frame of a screened lid when we get that built. 
Once we had the house built, it was time to decorate!

According to the vet, we should feed him on a stone so that his beak can get worn down naturally and we won't have to have it trimmed so often. He also needed a hidey hole, so we took another piece of flagstone and leaned it up in a corner, making a cave. Turtles should also have some sort of substrate in their habitat, so I bought some bark to lay down throughout the house. However, the thought of having to pick little turtle nuggets out of that bark made us rethink that plan. Instead, we just put the bark in his cave so he could burrow if he wants, and the nuggets will be easy to clean off of the indoor/outdoor carpet.

He's already taken the twenty five cent tour, and I think he's going to LOVE IT.

Next step: Making a screened lid so we can feed General crickets once in a while without the fear of them escaping and hiding behind the dresser, keeping us up all night with their song.  We'll post those directions when we get it completed.

July 11, 2010

The mother of all wasp nests

When you own a dog, chances are you'll own a dog house.  During the summers, in our dog house, we tend to get a few little wasp nests that usually never amount to much. Until this year.

The Gardener Guy mentioned to me the other day that we should probably check Dixie's house for nests, just to make sure she's not in any harm. AS IF she even uses the house in the summer, but I digress.

So we popped the lid on the house and WHOA BOY was there a wasp nest formin'!!  I've never seen one this big EVER.

Well, what's a Gardener Guy to do but get out the heavy guns?  Thank you Spectracide for making a spray that goes 27 feet.
I'm sure Dixie would thank you too if she could talk.

June 18, 2010

How to hang a small quilt

LONG TIME AGO when posting this project, I thought it would be a good idea to share the way that I make a small quilt hang-able.

It's super easy, and I kind of feel like I'm cheating when I do this, but it works so well.

First, I make a sleeve by taking a 1 inch (or so, it doesn't have to be exact) piece of muslin and iron over the unfinished edges. I whipstitch it to the back of the quilt with one end closed, one end open.


Then I simply take a bamboo BBQ skewer (the big kind work best as they're more sturdy) or two, to fit the length of the quilt, and slide it/them into the sleeve.


Sew up the open end with a few more hand stitches.


To make a hanger for the quilt I just sew on a small washer right smack dab in the middle of the sleeve. I always make sure to sew it on low enough that it won't show when hung up.


The skewers make the top edge of the quilt nice and stiff to ensure that your beautiful quilt will hang straight.

That's it. Piece of cake.

June 17, 2010

Quilted Photo Wallhanging

Here is the finished product.  Quilted and hung on the wall.  I. LOVE. IT.

April 27, 2010

First Craft Show of the Year - Spring Fling

My first craft show of the year was last Saturday and man, did it get me in the mood for more! 
A few things happened at the show that really got me motivated. 
  • First, people actually bought my items.  Sometimes I start getting worried that nobody will like my stuff and I'll go home penniless. I tend to be really hard on myself sometimes.
  • Second, I was told about//invited to 3 other BIG festivals or street markets.  That was pretty sweet. Knowing that people think my items and booth would be good at another venue is extremely flattering.
  • Third,  and frankly the icing on the cake......three people recognized my booth from this show I did before Christmas. Did you hear me?  PEOPLE ARE RECOGNIZING ME!!!  That's so cool.

April 13, 2010

Upcoming Spring Craft Shows


I've been busy with a capital B getting ready for a couple of upcoming craft shows.

To be honest, the only reason I'm so busy is because I'm a total slacker.  I've been procrastinating for way too long, and it just hit me the other day that I only have two weekends to work on stuff. Crap!

So.....this past weekend I ALMOST completed 12 jewelry/sewing pouches and 60 more pendants.  That means that this week I'll have to bust my butt to finish those so I can work on Moleskines and pincushions next weekend.  I'm tired already just thinking about it.

Wish me luck!

April 12, 2010

Nature's Modern Art or White Trash Yard Art

With Spring snow melting fast around here, we couldn't help but appreciate this.


Mother Nature is so my people.  Artistic with a sense of humor. Who knew? 

The Pink Wallhanging - Completed


I finally decided what to do with this project.  I'm going to donate it to my son's school for a silent auction being held to send the Circus Arts club to Washington D.C.  Sending talented kids to the nation's capitol seems like a way better idea than having this sit in my shop for who knows how long.  Who doesn't love helping kids??


It was looking pretty plain jane, so in order to jazz it up and make it seem more relevant to the purpose of the auction, I added a few inspirational words. I hope it goes for lots of $$. These kids deserve it.

April 7, 2010

Photo turned into a wall hanging

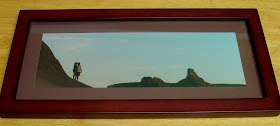
Do you guys remember 1999?  The year Prince - or whatever his name is these days - sang about?   The year before Y2K?  The year these totally awesome panoramic size photos were all the rage?

It was also the year before Gardener Guy and I got married.  We went with his family to Lake Powell and stayed on a houseboat for a week.  That was the first time only time I've ever done that and it was pretty damn fun.

My sister in law took this photo of us at some point in the trip, I don't remember when. It's now my favorite picture of us. I've always wanted to hang it up, but ironically it's kind of small.  Too big for the picture table, but not quite big enough for a space on the wall.

So, being the crafty chick I am, I decided to enlarge it and make it a quilted wall hanging.  I was further inspired when I saw this post by Elizabeth on Sew Mama Sew.  What an easy way to sew itty bitty pieces of fabric together!  I had to try it.

 It worked okay, but I think I need practice.  That interfacing is kind of stretchy, especially when you start sewing all the rows.  Some of my seams are a little arched, so don't look too close.

While I was trying new things in my quilting, I thought I'd give "thread painting" a shot. I wanted the clouds to be light and barely there, like in the photo.  I didn't want to fuse some glaring white (or even off white) fabric onto my beautiful sky.

I'm not sure I pulled it off.  From a distance, you don't even see the clouds. I don't think white thread was the best thing to use. Maybe the thread painting works better with a bunch of different colors, instead of just one.

I feel like this post has gotten kind of wordy, so I'll save my super easy way of hanging it for another time.

Oh!  While I was tooling around the blogosphere the other day, I came across another photo turned into a wallhanging over at Upstatelisa. Go check it out, it's gorgeous!!